Earn FREE HAIR COUTURE by hosting a home OR virtual Adam's Blankie party! Email adamsblankie@gmail.com for details!!

Sunday, March 13, 2011

How to Make a Ruffle {Paper Ribbon and Flower}

I have never been a big fan of that plasticky thin type of "birthday party ribbon."  You know the kind.  The kind that goes on packages and is all "frizzed up" on top.  It's the same kind tied to every balloon, as well.  Anyway.  Not a huge fan of it.  But I DO love me a pretty package.  Now, you could always buy pretty ribbon to atop a gift.  But at about $3 or more for less than 10 feet usually, this can get spendy.  Afterall, you don't want to be spending another $5 just for the gift topper, ya know?

So I came up with doing a ruffled crepe paper ribbon and flower to top your gift instead.  It's super cost-effective {you can get a whole roll for just 99 cents, which would last you through OODLES of presents!} and looks just plain pretty.  I'm a fan.  Heck, I'm a fan of anything ruffled!!  


I'm going to take you through how to make these yourself!  Keep in mind, you can use these same steps to ruffle anything!  From fabric and paper to ribbon and more!  So here's how you do it:

Take your crepe paper and wrap it around the gift two times.  Cut your paper there.


Now you're going to set your sewing machine to the loosest setting and the longest stitch {these numbers area  "0" and "5" respectively, on my machine} to make our basting stitch.   Be sure to leave "tails" for you to pull when you sew this, and do NOT do a backstitch ~ we do NOT want the basting stitch secured!  Just sew right on down the middle of your crepe paper.


Once you've sewn all the way down the middle {length-wise, of course}, you're going to form your ruffle.  Do this by using one hand to hold just one tail on one end.  And use your other hand to gently {especially since we're working with crepe paper!} start pulling the crepe paper over the thread, forming a ruffle.  Keep doing this until you have ruffled your entire paper length.  At this point, you'll want to wrap the paper around your package to see if you need to make your paper more ruffly {meaning, keep ruffling as you were} or less ruffly {meaning, pull some of the ruffles off} to fit the package right.

 Once you have it fitting around your package properly, you're going to set your sewing machine back to its "normal" sewing tension and stitch length.  Sew right back over your ruffle down the middle; this time DO your backstitch when you both start and stop to secure your seams.

Once you've secured your ruffle, go ahead and trim off all the loose threads on the end.  Normally, we'd remove our basting stitch {more for when working with ruffles on permanent items {i.e., curtains, clothing, etc.}, but since this is just going to be thrown away, don't even both with that extra step.

Wrap it around your package and secure with clear tape on the bottom of your gift.  You could also make another ruffled ribbon to go around the other length of your gift.  I just chose not to here, as these are just for my daughter's first birthday, and the less "ribbon" for her to get off, the better!

For the flower on top, you're going to do the same steps above.  I cut about 30 inches for my crepe paper length for the flower.  Feel free to use your judgment here, though.  The longer your crepe paper, the bigger the flower will be, of course!

After you've ruffled and secured your ruffle for the flower, simply take one end and fold it 180 degrees, back onto the rest of the ruffled paper ribbon.  Hold it in place there with one thumb.


Using your other hand, begin turning the paper around the center "bud" you formed with your thumb.  If you're right-handed like I am, you will be holding the "bud" with your right thumb, and using your left hand to form the outer petals of your flower.  Do this by just turning the remainder of the paper around and under your bud.  Be sure that each layer of flowers keeps going farther away from your bud, so that you can see all the layers.  Once the way you want it, head on back to your sewing machine and just tack it down {stitch in place} in a few areas to secure your flower.  Then just trim off all the threads {be sure NOT to cut your paper!}, and fluff up a little.


That's it!  Just put a little double-stick tape on the bottom of your flower and secure to your ruffled ribbon on your package already!


Have a product you'd like reviewed?
Contact me at adamsblankie@gmail.com
www.adamsblankie.com
www.gourmetplay.etsy.com

Thursday, March 10, 2011

{Tutorial}: Felt Labels

I love to label things.  Well, I guess I should make myself more clear...I love to organize things. From all my canned goods' labels facing forward {I know, I know....} to everything having its own place, I strive for organization in our home.  Admittedly, I don't always prevail.  But, alas, a girl can try, right? :)


So this past week I decided to make some labels.  I had originally made some of these a few years ago, when my son was born, in an effort to organize some of his toys.  I used them on his baskets of blocks then, and I'm still using them for this now.  Although, of course, these could be used for multitudes of things - from boxes of pictures to drinks with "name tags," these are handy to have around.  The best part?  Once you make them, you can keep them forever because they're made to be interchangeable.  As in, you can swap out the label and put in a  new one.

So anyway, I decided to redo my son's labels {just because I wanted them in a different color!}, and thought, "Hey! I gotta put this on the blog so that everyone can have some of these!"  So here we are. :)

What You Need:
*felt {1/4 yard...more if you want more squares, of course}
*cardstock {one piece of paper will do}
*sewing machine {or needle and thread}
*scissors {one for paper-cutting, and one for fabric-cutting}
*twine {or ribbon}
*stencil {optional}


Cut your felt into 8 pieces that are 4x4 inches each. Cut your cardstock into one square that's 4x4 inches.

So now you need to decide on what shape of an opening you're going to put on each label.  You could just do circles, ovals or hearts, for example.  For mine, I chose stars.  {You want to keep the shape/design simple, because it's just a silhouette}.  Now, I could have gone online to search for a "star silhouette" in Google images, but since these are for my son's room, I decided to just freehand them and make them appear more child-like.  Once you know what shape you're doing, go ahead and draw {or trace if you're using a template} it onto your piece of cardstock.

Take your scissors, and poke a hole through the center of your design. Cut out the shape. {NOTE: for shapes with lots of points {like my star!}, it's easiest to cut out toward each point with your scissors first.  Then cut out the whole shape.


Take your cut-out shape and pin it, centered, onto one of your felt squares.
Fold the felt square in half, and use your scissors to cut a small slit in the middle.

Now, using the same technique I referred to earlier, cut out the star shape from your felt square.

Repeat these step on 3 of your other squares, so that you have 4 squares with stars {or whatever shape/design you're doing} cut out of the centers.

Take your remaining 4 squares and cut 1/2" off one of the sides of each of them.  Then take one felt square with a star and pin it to one felt square without a star.  Be sure the felt piece with the one shorter side now is matched up to the top of your felt design.
{front and back of how it looks when your pieces are pinned together properly}
Sew your 2 felt squares that are pinned together. Use about a 1/4" seam, and be sure you backstitch when you start and stop to secure your seams.  **NOTE: You are going to sew along the BIGGER square, that is, NOT the one we cut down an extra 1/2 inch.  {If you sew along the edge of the one we cut down, you'll end up sewing your square shut and won't be able to put your label inside}.

Repeat this last step you did with all your squares (Pin them all together, and sew them all together).  Once sewn together, take your scissors and trim off any excess felt on the sides that may have slid around and isn't perfectly aligned any more {this will just even up all the sides}.

Cut two little slits near the top of each your completed squares, just below your stitchline. {These are for threading through your twine to hang your label}.  One slit will be just to the right of the center of your label, and the other, just to the left of your labels.  Each slit needs to be only about 1/4" - 1/2" in length. {It's easiest to fold over the fabric a bit to make your slit - see below}.
Go ahead and slide your 4x4 inch squares into each label's pocket.
Write whatever label you want on each of your pieces of paper.
Cut your twine - you'll need one for each label, of course.  Cut them anywhere from about 5-10 inches in length each.  Then thread each one through your slits you cut earlier.  Start poking the twine through from the front of your square. Then go around the back and poke from the back up through to the front again. 
Tie them onto your item you label, knot it, and you're set!


Have a product you'd like reviewed?
Contact me at adamsblankie@gmail.com
www.adamsblankie.com
www.gourmetplay.etsy.com

Tuesday, March 8, 2011

My son's preschool is in our town's downtown.  The downtown area is cute, quaint and rustic - I love it!  So, amongst the many other shabby chic-style places next door, there sits the cutest little wedding chapel.  And right outside their porch, sits this bike.  A bicycle built for two {you know the song, right?!}.  Soooo ridiculously cute!!  But what's even cuter?  The sign on the back.  Don't you just love it?  I wish I would have had the opportunity to take some pictures on a bicycle like this when my husband and I got married.  I just know this sweet vintage bike makes for the best pictures!


Have a product you'd like reviewed?
Contact me at adamsblankie@gmail.com
www.adamsblankie.com
www.gourmetplay.etsy.com

Monday, March 7, 2011

Amy Butler Girls Closet Labels - DEEP DISCOUNT!

I have this adorable set of closet clothing label hangers for a little girls' room up for auction.  I actually purchased them for $30, and am asking just $15 for the set (plus shipping, of course).  They go from 0-2T and would make for a beautiful baby shower gift!  Please note, they do NOT come with the green ribbon shown in the picture.  They are hangable by the circular cuts, OR you can add your own ribbon.

Please email me if interested!  adamsblankie@gmail.com


Have a product you'd like reviewed?
Contact me at adamsblankie@gmail.com
www.adamsblankie.com
www.gourmetplay.etsy.com

Friday, March 4, 2011

{Tutorial:} Iron-On Art

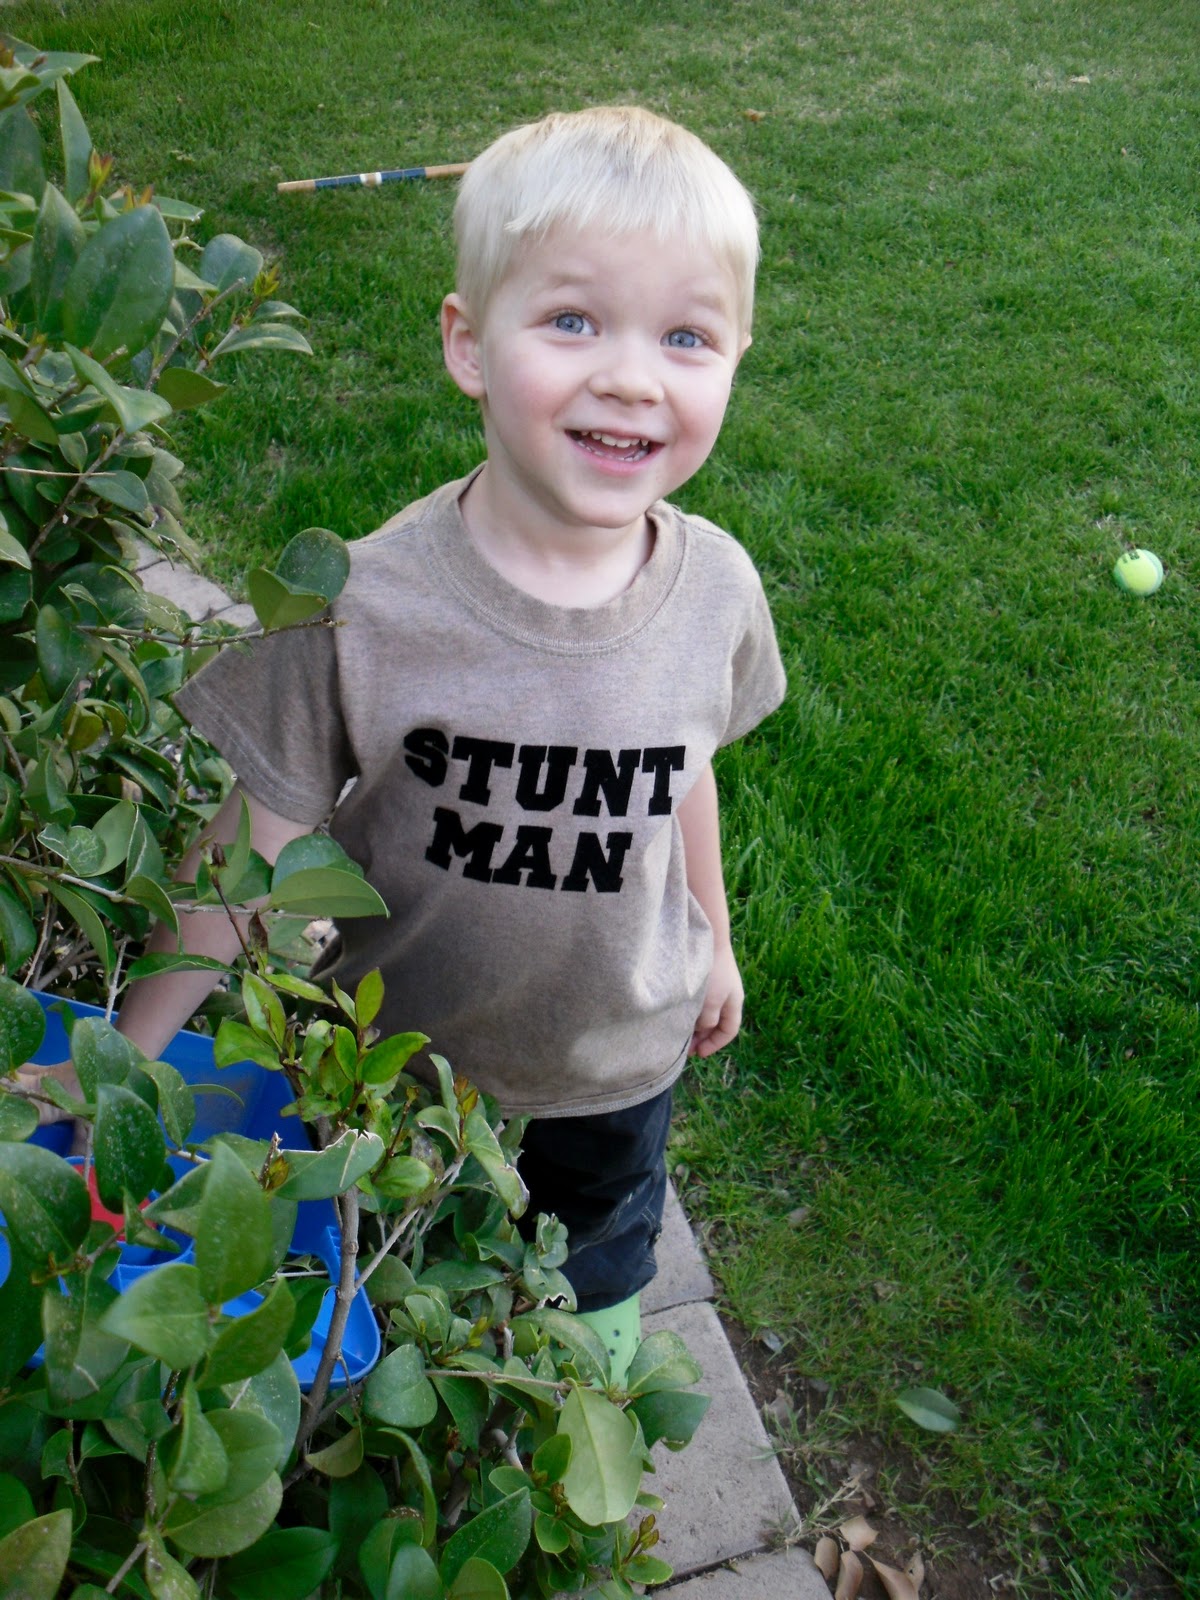
Okay, so let me just start off by saying that this particular tshirt is totally not my idea...  I must admit that I saw it originally at j.crew.  It was clever and ever-boyish, so of course I thought to myself, "I must have this!"  Not for me, of course...but for our little guy! Afterall, what little boy isn't his own stunt man in some way?!  But alas, at $29.50 a pop, I figured it looked easy enough to make a replica myself.  And so began my search....

Turns out it's pretty easy to make a shirt like this!  All you need is:

*tshirt
*iron-on art {flock transfers}
*iron
*ruler
*fabric dye {optional}

So once I had my supplies {you can find them all at a craft store like Joann's or Hobby Lobby}, I began to work on it.  I found a heathered gray tshirt for $2.99.  I decided to go ahead and purchase some tan dye {Rit brand - $3.99} to make it a bit more like the original j.crew shirt {totally unnecessary, but hey, you have options!}.  You can follow the instructions on the bottle to dye the shirt, but basically I put some hot water in a bucket, poured in maybe a few tablespoons of the dye, and put my shirt in.  I let it sit there a couple hours.  Then I rinsed it until the water ran clear, washed it {I decided to wash it by itself in case some more dye came out of it} & dried it.

The shirt came out a nice heathered tan color {of course!}.  I thought about putting it in a bucket again with some more water and a little bleach to lighten it up a bit, but decided it was good enough as is! Again, you have options here!

Then it's just a matter of peeling {carefully! They tear easily I discovered!} off your letters and lining them up where you want them on the shirt.  I just eyeballed the spacing and center of the shirt {though you could use a ruler}, and then used my ruler to make sure they were straight.


Then just set your iron to the cotton setting with NO WATER in it, and press for about 20 seconds.  Repeat this on all parts  Then turn shirt inside out and repeat pressing, and, Presto! Insta-j.crew look-alike shirt for less than half the cost {plus I now have extra letters and dye for future projects!}!

Here's A-Train showing off his "stunt skills" with his new shirt! {love}.


I also purchased a tshirt and some white letters in a more feminine font and made a shirt for Baby K!  I had a hard time coming up with a saying to put on it.  I knew I didn't want to do any "princess" type print...but other than that, I was open to something witty and fun.  At first I was thinking of just putting "wild woman" on it, because that is what I call her from time to time, as she is, indeed, a wild woman...well, maybe "wild child" would be more appropriate, but "wild woman" is funnier!  Anyway.  I ended up putting "lactose tolerant" on it, thanks to the ingenius idea of my husband!  Love it!


So, how about you?  Have you done one of these before?  Thinking about doing one now?  If so, what slogans and cute things have you used, or do you plan to use?

Have a product you'd like reviewed?
Contact me at adamsblankie@gmail.com
www.adamsblankie.com
www.gourmetplay.etsy.com

Wednesday, March 2, 2011

{Project}: Ruffled Skirt

So one of the latest clothing projects I've been working on is a new skirt {and matching shirt} for Baby K.  I made it from my "juicy watermelon dots" fabric and added three rows of some hot pink ruffles on the back.  Then I just bought a regular ol' plain white tshirt and added a bib embellishment with some buttons  and a ruffle to match!

I actually originally had a ruffled bottom on the skirt....but it turned out too long for her to wear now.  So instead of ripping it out, I decided to hem it under.  The skirt is cute enough by itself without that extra ruffle...and when she gets a little older {and taller}, I'll just undo the hem, and then the ruffly part {the orange polka dot part, shown below} will show!

Here is Baby K modeling it for you...not the greatest pictures {I still have NO CLUE how people can get great pictures of little ones..they move toooooo much!!!}, but you get the idea of how it looks on. :)


I'm thinking of offering the skirt in my shop {without that ruffled bottom}...what do you think?  Is this something you'd like to see offered there?  If so, what fabrics do you like best for it {see below for choices}??  Also, if you're more of the crafty type yourself, would you be interested in a tutorial for this?


Have a product you'd like reviewed?
Contact me at adamsblankie@gmail.com
www.adamsblankie.com
www.gourmetplay.etsy.com

Monday, February 28, 2011

{Tutorial}: Vintage Wood: How to Distress

Vintage is in.  Everywhere you look, you will see vintage-inspired items. {I say "inspired" because most of it is not actually vintage ~ it just looks vintage}.  From frames and furniture to jewelry and hair accessories, it. is. everywhere.  Now, what precisely do I mean by vintage?  Old.  Worn. Weathered.  Beautiful.

So, I've been perusing stores to see what I can find in this realm {by the way, there is a fantastic store in the Phoenix Metro area if you're local ~ it's called "Potato Barn."  If you live here, be sure to check it out if you're looking for old, farm-style, vintage-inspired pieces!}.  Most of it is fairly expensive...and unfortunately I have not come across many cool, urban antique-y stores around here {with the exception of the aforementioned one; so if you know of any, please do share!}.  At this point I've been mostly just looking because I'm not exactly sure how to implement some of it into our home...not sure how far I want to go with it, ya know?  If I would have thought of this a year and a half ago, I would have done a vintage-inspired French baby nursery...but too little too late there.  However, I think I'll use that same theme to redo Baby K's room in another year once she's outgrown her nursery.

Here is some inspiration for that room makeover....more than a year away, of course, but it doesn't hurt to start looking early!

french vintage postcard
handpainted telephone
stamp
french vintage collage
french vintage postcard
vintage-inspired - love the doilies and jars

vintage dress forms
vintage-inspired necklace I got yesterday...loving it!
love these rings!
So now that you're inspired to add some vintage into your home, too, let's get started!  As far as doing it yourself goes, distressing wood is a great way to begin adding that vintage feel to your home.  For my first project, I started small with picture frames.  But I'd love to try this same technique with an old wooden dresser or table...add some vintage-inspired glass knobs, and I be it'd be beautiful!