Earn FREE HAIR COUTURE by hosting a home OR virtual Adam's Blankie party! Email adamsblankie@gmail.com for details!!
Showing posts with label recipes. Show all posts

Wednesday, October 3, 2012

Pumpkin Cookies

October has finally arrived!  That's a HUGE relief when you live in the hot, dry desert and can finally see the light coming at the end of the tunnel!  Mind you it's STILL over 100 degrees here...but alas, the triple digits shall soon be gone!

This month always means the beginning of the baking season in my kitchen, and I love to start with apples and pumpkins.  I normally kick it off with some amazing pumpkin bread, but I decided to try a new recipe that came in a flier from my son's school, of all places!  So the kids and I had at it this morning.  The results?  More like a fabulous moist pumpkin bread than a cookie, per se, and Ooooooh-so-Delicious!


Delicious Pumpkin Cookies with Brown Sugar Frosting
1 cup butter (try to get to room temperature before creaming)
1/2 cup brown sugar
1/2 cup white sugar
1 cup canned pumpkin (I used more than one cup for mine (almost a whole 15 oz can) to yield super moistness!)
1 egg
1 tsp vanilla (you might try more here)
2 cups flour
1 tsp baking soda
1 tsp baking powder
1 tsp cinnamon (you might opt for a touch more of this, too!)
1/2 tsp salt

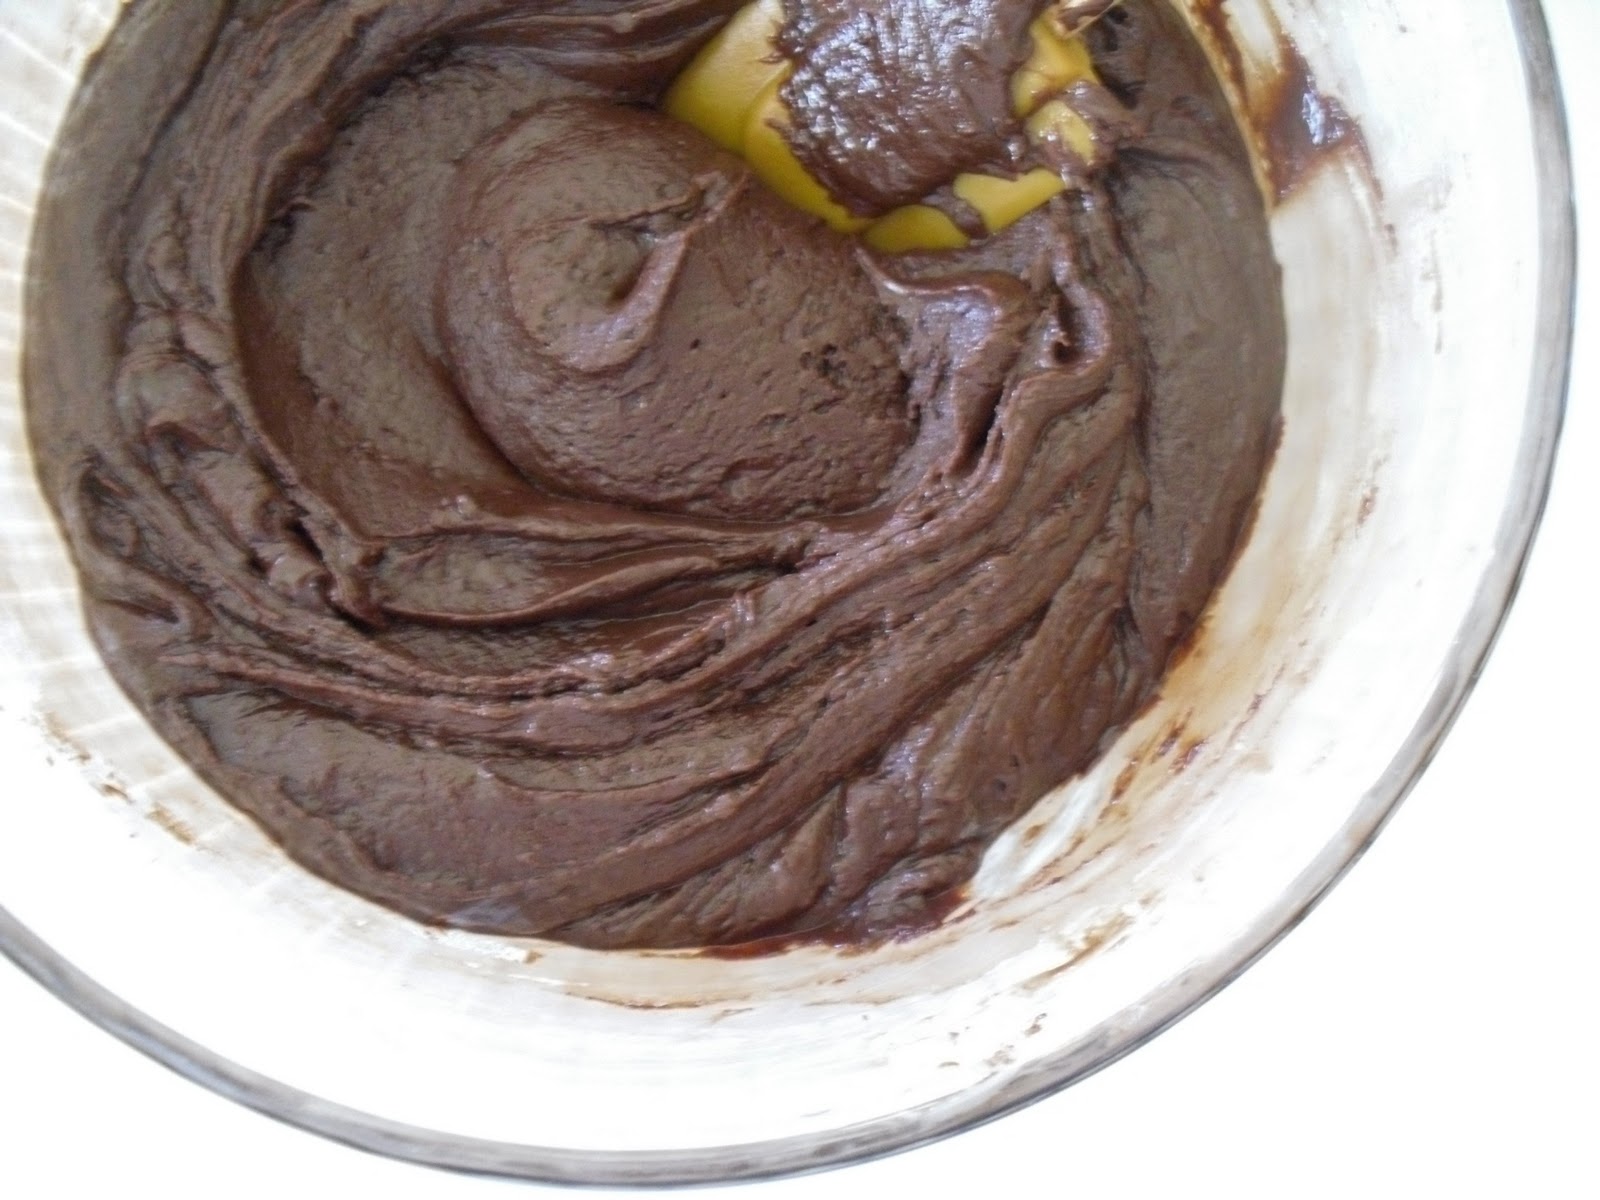
Cream sugars and butter. Add pumpkin, egg, and vanilla. Add remaining ingredients. Drop spoonfuls onto non-greased cookie sheet (we opted for parchment-lined sheets at our house).  Bake at 350 degrees for 10 - 12 minutes.

Frosting:
**we actually didn't make the frosting and are just eating them as is, but I'm sure with this on top, they'd be even more amazing!

Heat 3 tablespoons butter and 1/2 cup brown sugar in saucepan until mostly smooth. Cool and add 1/4 cup milk and 2 cups powdered sugar or until desired consistency, and whip with hand mixed until smooth. Spread onto cookies.

Have a product you'd like reviewed?
Contact me at adamsblankie@gmail.com
www.adamsblankie.com

Tuesday, December 20, 2011

Recipe {Pistachio Pomegranate Chicken Salad}

I am a believer in "everything in moderation."  Sure I think you should eat healthy, but I also think burger with friends and milkshakes is good sometimes, too!  And, I almost always have to have dessert.  Almost always. Okay, so maybe I'm not so much of a health nut, but I do {I do! I do! I do!} try to get healthy foods into me!!  So when I came across this next recipe, it sounded right up my alley, and I knew I'd be making it soon!
{photo from Clean Eating Jan/Feb 2012 issue}

I recently ordered a subscription to the magazine, "Clean Eating."  As I'm sure you can guess, it's all about eating healthy, or "clean," as they refer to it.  I love that it's chock-full of recipes {and many are "reader recipe tested"}, and I really love that the foods are not bland, as you might presume "healthy meals" would be.

So I am glad to say I "recipe tested" this one, and it was dee-LISH-ious! And even better yet?  Not much time to prep {just shell the nuts & get the pomegranate arils out earlier in the day, and it will come together in a breeze, come dinner time!}.

Hearty Chicken Salad {or as I like to call it, "Pistachio Pomegranate Chicken Salad"}
{serves 4, 20 minutes hands-on time}
4 5 oz boneless, skinless chicken breasts {I used chicken tenders instead, which cook faster}
3 tbsp plus 1/4 cup fresh lemon juice, divided
salt & pepper, to taste
1/4 tsp cayenne pepper
evoo {olive oil - enough to cook chicken in ~ couple tablespoons}
8 oz fresh baby spinach
1/2 red onion, cut indo paper-thin wedges {I left these out}
1/2 cup pomegranate arils {I bought a whole pomegranate and removed arils from it; be sure to remove yellow/white pith from them, as the pith is bitter; your store may also sell these already removed from the fruit itself.  Oh, and p.s., my kids LOVED to snack on these alone - and they're so, SO good for you!!}.
1 oz shelled raw unsalted pistachios {again, your store may sell already shelled for you}
1 avocado, pitted, peeled and diced

Dressing {NOTE: I did NOT make the dressing here ~ instead I used pre-purchased Caesar dressing - sorry, couldn't be that healthy this first time around! One step at a time! Ha!}
1/4 cup nonfat plain Greek yogurt
2 tsp evoo

In a large, shallow bowl, add chicken and 3 tbsp lemon juice. Turn to coat. Sprinkle salt, pepper and cayenne on all sides of chicken.  Set aside.

Put a skillet over medium heat and drizzle with a couple tbsp of EVOO.  Add chicken and cook, about 5 minutes per side.  Transfer to cutting board to let cool. {If you cooked breasts {versus tenders}, you'll need to slice these at an angle, once they're cool enough to handle}.

Meanwhile, prepare dressing {or use store-bought Caesar, like me! So good!!}:  In a small bowl, whisk remaining lemon juice, yogurt, oil and salt & pepper to taste. Set aside.

In a large bowl, toss spinach, onion, pomegranate and pistachios and divide among serving bowls/plates.  Top with chicken and avocado and drizzle with your dressing.

Enjoy a heart-healthy recipe {that actually tastes amazing!!}!

Have a product you'd like reviewed?
Contact me at adamsblankie@gmail.com
www.adamsblankie.com

Tuesday, November 29, 2011

Double Chocolate Cherry Cookies

Who doesn't love chocolate & cherries?  This cookie has a sweet, moist texture and complements the chewy goodness of the cherries perfectly!  Use either sour cherries for a zing, or regular dried ones for that super sweet tooth!
{photo courtesy of Martha Stewart's COOKIES book}.

This recipe hails from the "Cookies" book by Martha Stewart...and one thing I've noticed about pretty much all her recipes, is that she uses parchment paper on her cookie sheets.  LOVE this! Makes for easy cleanup and not sure how, but somehow the cookies seem to turn out better...softer and chewier....  This woman really knows her stuff!!

Enjoy!!!

Dark Chocolate Cookies with Sour Cherries
1 3/4 C all-purpose flour
1 1/3 C unsweetened Dutch-process cocoa powder
2 tsp baking soda
1/4 tsp salt
1 1/4 C (2 1/2 sticks) unsalted butter, room temperature
1 1/4 C granulated sugar
3/4 C firmly packed dark brown sugar
2 large eggs
1/4 tsp pure vanilla extract
12 ounces bittersweet chocolate, coarsely chopped {or just use chocolate chips}
1 1/2 firmly packed cups dried sour (or not!) cherries (9 oz)

1. Preheat oven to 350 degrees. Line two baking sheets with parchment paper.

2. In a bowl, sift together the flour, cocoa powder, baking soda & salt.

3. In the bowl of an electric mixer fitted with the paddle attachment, cream the butter & sugars until fluffy.  Add eggs and vanilla; beat until well combined. Add the flour mixture, and beat on low speed until just combined.  Do not overbeat. With a wooden spoon, fold in chocolate and cherries.  (Dough can be frozen at this point, wrapped well in plastic, up to 1 month; thaw completely before baking).

4. Form balls into dough, each about 1/4 cup; place balls on prepared baking sheets about 3 inches apart.  Bake until puffed and cracked, 9-11 minutes, rotating sheets halfway through.  Transfer to a wire rack to cool completely.  Cookies can be stored in an airtight container at room temperature up to 3 days.

Have a product you'd like reviewed?
Contact me at adamsblankie@gmail.com
www.adamsblankie.com

Monday, August 15, 2011

Peanut Butter Pie {Recipe}

I made an absolutely sinful Peanut Butter Pie the other day!  As some of you may already know, I have a serious weakness for anything peanut butter, and this. one. takes. the. cake! {errrr, pie!}!!


It's a very easy recipe, too, and doesn't take too much time to make! 

{Peanut Butter Pie} 
1 jar creamy peanut butter {the middle size one will do!}
1 cup sugar
1/2 of 8 oz original cool whip
1 8 oz package of cream cheese {let warm up to about room temperature}
1 jar of hot fudge
1 oreo or graham cracker pie crust

In a large bowl, mix the sugar, peanut butter, and cream cheese in a mixer until smooth.  Fold in half of the cool whip until thoroughly mixed.  Spoon the mixture into the pie crust, and refrigerate.  While the pie is in the refrigerator, put aside a tablespoon each of the peanut butter and hot fudge into plastic baggies, in the corner of them.  {You'll later cut a very small part of the corner and pipe onto the top of the pie!}. Then place the rest of the jar of hot fudge in the microwave to melt {check instructions on jar for how long to microwave}.  Once it's smooth, pour it evenly on top of your pie, all the way to the edges.  Place pie back in refrigerator.  When you're ready to serve, cut the very tips {very small part!} of your baggies and pipe the fudge and peanut butter over the pie in a zig zag motion.

Mmmmmmmmmm.....dive in and savor every drop of this rich little thing!

Have a product you'd like reviewed?
Contact me at adamsblankie@gmail.com
www.adamsblankie.com

Wednesday, June 22, 2011

Celebrating the 4th of July {Ideas to Inspire!}

Hope you all are having a fantastic week so far and are actually enjoying welcoming in summer around your parts!  As I'm sure you can imagine, we do *not* welcome in summer in Phoenix {well, us "rational" ones, anyway}...we instead dread the upcoming 5 months of sheer blistering heat that torture us desert rats.  For me, the start of summer is the start of my own personal countdown to the winter!
That being said, I've always enjoyed the 4th of July!  Growing up in the midwest, we were able to do our own fireworks - an event that I always looked forward to!  Now that fireworks are legal {to buy yourself} here in Arizona, I'm especially looking forward to introducing my kids to my own beloved childhood tradition!

So to welcome the upcoming festive holiday, I am bringing a post to you from one of my newest & inspirational friends! Heidi from cherry blossoms {be sure ya'll check out her blog - it's full of gorgeous pics and creative ideas!} is one of the most adorable, sweetest people you'll ever meet!  She's highly personable and extremely down-to-earth - two traits I admire greatly!  She is going to kick off a series of guest blog posts I'll be doing throughout the summer months...so please sound off a great big "hello!" to Heidi!  {Here she is...}

 Hello Everyone!
I'm Heidi from cherry blossoms and I am so excited to be guest blogging for Kari today! I officially met Kari a few months ago when I hosted a baby product party in my home and we both learned we are originally from North Dakota! {I know, small world!} I am also a big fan of Kari's adorable headbands {wish I had her talent} and bibs, as my little girl can often be seen debuting her Adam's Blankie couture items.

Being a first time mommy and a working mommy {I'm a school social worker} I found it's important to have outlets...one of my outlets has become blogging. I love to blog about fashion, baby product items, baking {cupcakes!}, party inspiration, and basically anything that fancies my heart at the moment.

With summer in full swing and the 4th of July only days away, I thought it would be fun to feature some inspirational ideas!

Flag banner to greet your guests

Bean bag toss for the kids

a holder for sparklers. {My favorite!}

delicious cupcakes

or how about this delicious red, white, and blue sprinkled cake via paper and cake


Wishing you all a happy and safe 4th of July holiday weekend!

Have a product you'd like reviewed?
Contact me at adamsblankie@gmail.com
www.adamsblankie.com

Monday, April 18, 2011

Cinnamon Vanilla Snack Mix

One of my girlfriends {thanks, Beth!} told me about this recipe, and upon hearing it, I just knew I had to make it!  And with my other pregnant friend coming into town this week, I thought I better hurry up and make. it. NOW! I'll tell you right off, it's certainly not the healthiest thing to eat, but every once in a while, I think you can do it.  Plus, it's the perfect movie companion.

So upon making and tasting it, the verdict is in, and it's deeeee-licious!  It's super easy, too, and doesn't take much time at all {although you must be patient and let it dry a bit at the end}.  Better yet, the kids can help!  With the perfect mix of sweet, salty, smooth, crunchy and a hint of spice, it's a winner all around.  So go ahead ~ give it a try!  I promise you won't be disappointed!


Cinnamon Vanilla Snack Mix
1 bag of pretzel sticks
1 bag of popped plain popcorn
1 bag of Fritos
Peanuts (the original recipe didn't call for these, but I thought it would be a great addition - it was!)
1 bag of Vanilla Candy Coating (or almond bark..heck, even a bag of chocolate (or any flavor you like) chips would work)
cinnamon

1. Lay out a couple pieces of wax paper on your countertop.

2. Put your Fritos (I used about 1/2-2/3 of a bag), popcorn, pretzel sticks (again, about 1/2-2/3 of the bag) in a large mixing bowl OR brown paper bag.  Toss around.

3. Melt the coating.*

*I used the double boiler method because I think there's less of a risk to burn it, plus I always like to use the stove instead of microwave, if I can.  As I've mentioned before in some recipes I've posted, you don't actually need a "double boiler" to do this.  Do as I do, and fill up a pot with water.  Find a glass bowl that fits in it, but won't fall through all the way.  Put your candy in this and turn up the heat on the burner - say medium-high.  Continually stir until it melts.

4. Pour the melted candy coating over the mix of popcorn, chips and pretzels.  Toss around to coat (using a big wooden spatula works well for this).  OR you can pour it over your chip mixture in the big brown bag and shake around to coat.

5. Pour it all out onto the wax paper. Spread it out evenly.

6. Sprinkle cinnamon over it all - do so pretty liberally.

7.  Let dry about 25 - 30 minutes.

Mmmmmmmm................so good! :)  Now just enjoy it with your kids, your husband or some girlfriends.  Hmmm...I think this might make another feature at our first Girls'  Craft Night coming up soon! :)

Have a product you'd like reviewed?
Contact me at adamsblankie@gmail.com
www.adamsblankie.com

Tuesday, February 22, 2011

{Recipe}: Sugar Cookie Cut-Outs {Perfect for Easter!}


I have always had a great love for a fabulous sugar cookie.  But until this past week, I'd never found a recipe where the cookies turned out well...or maybe it's just that I had never perfected it properly.  A couple years ago I purchased Martha Stewart's Cookies cookbook, though, and I have discovered some fan-tabulous recipes in it!  I would say all of my favorite cookies are from it actually!  So, if you don't have it yet, get a copy!!

Last week my son and I had some great fun in the kitchen making these!  {Well, he lasted through the tasting of the batter on the beater and cutting out a few cookies, but he had fun, and I had lots of fun with the whole experiment!}  We made heart-shaped cookies for Valentine's Day, but the real test here was trying to see if I could come up with an "edible" cookie for my daughter's 1st birthday party coming up next month! {We plan to wrap up butterfly ones in cellophane to give as party favors}.

Sugar Cookie Cut-Outs {yields 2 dozen 4" cookies}
4 cups sifted all-purpose flour, plus more for dusting
1 teaspoon baking powder
1/2 teaspoon salt
1 cup (2 sticks) unsalted butter, room temperature
2 cups sugar
2 teaspoons pure vanilla extract
2 cups sugar
2 large eggs
Royal icing (optional; recipe follows)
food coloring (optional)
Fine sanding sugar (optional)

1. Sift flour, baking powder and salt into a bowl.

2. Put butter and sugar in the bowl of an electric mixer fitted with the paddle attachment.  Mix on medium speed until pale and fluffy.  Mix in eggs and vanilla.  Reduce speed to low.  Gradually mix in flour mixture.  Divide dough in half; flatten each half into a disk.  Wrap each in plastic.  Refrigerate until firm, at least 1 hour or overnight.
mmmmmmmmmm....cookie dough!

3. Preheat oven to 325 degrees, with racks in upper & lower thirds.  Let one disk of dough stand at room temperature until just soft enough to roll (about 10 minutes or so).  Roll out dough onto a lightly floured surface to about 1/4" thickness (add more flour as necessary to prevent sticking).  Cut out cookies with a 4-5" cookie cutter, transferring them to parchment-paper lined baking sheets as your work.  Roll out the scraps, and repeat.  Repeat with remaining dough disk.  Chill cookies in freezer until very firm, about 15 minutes.
enjoying doing the cut-outs!


4. Bake, switching positions of sheets and rotating halfway through, until edges turn golden, 15 - 18 minutes {DISCLAIMER: My first batches came out a little too hard for my taste.  Following the recipe will yield a crisper cookie.  If you want a softer sugar cookie, make sure the cookies are at least 1/4" thick and bake only about 13 minutes!}.  Let cool on sheets on wire racks.

Royal Icing {yields 2 1/2 cups}
1 pound confectioners' sugar, sifted
5 tablespoons meringue powder
Scant 1/2 cup water

Combine all ingredients in the bowl of an electric mixer fitted with the paddle attachment.  Mix on low speed until smooth, about 7 minutes.  If icing is too thick, add more water; if too think, beat icing 2 - 3 minutes more or add confectioners' sugar a tablespoon at a time.  Use icing immediately, or store in an airtight container up to 2 days (icing hardens quickly when exposed to air!}.  Beat well with a rubber spatula before using.

How to Frost a Cookie with Royal Icing
Okay, bear with me here.  I'm not trying to poke fun at you for not knowing how to frost a cookie!  But I did learn that there is a specific way to work with royal icing in particular to get good results.

1. Attach a tip to a pastry bag fitted with a coupler {if you are unfamiliar with all these terms, please visit the Wilton website ~ they've got about everything you need to know about making and decorating cakes, cupcakes & cookies!}.  Form a cuff with the top 3 inches of the bag.  Set a damp paper towel in a glass; place the empty pastry bag upright in the glass.  Spoon icing into the bag until it is 2/3 full; cinch with a rubber band to prevent icing from seeping out.

2. Outline the whole cookie using a #2 tip {or any of the small "plain hole" tips - I used a #4, and it worked just fine!}.  Let the icing set for 5-10 minutes.

outling the cookie {upper right}

3. Then using a #5 tip {again, here I kept with the #4, and it worked fine}, draw several zigzags across the entire surface of the cookie {this is called "flooding"}.
"flooding" the cookie {upper right}
4. Spread icing evenly over the cookie with a small offset spatula {don't ask me what "offset" means ~ just use a long, flat one!}.  Allow the icing to dry overnight.  Store unused Royal Icing in an airtight container at room temperature {as long as it's made with meringue powder {see image below}}.  When ready to decorate, use a #2 tip to pipe your design. 

spreading on our "butterfly" cookies


available in the baking/cake section of Michael's or Wal-Mart {among many other Wilton products!}

You can also take different color of frosting and use a toothpick to swirl into your already frosted cookie while still wet {see one of the heart cookies below for an example of how this might look}.

The book does go on with instructions for adding decorative designs on top of your basic frosting "shmear," but we didn't go that far this time.  Basically, once your frosting layer has been set, you can pipe on whatever else your little heart desires.  While wet, you can also spoon over lots of sanding sugar and let set 5 minutes.  Then shake off excess.  You can even purchase special pastry brushes to dust off the excess sugar!   But anyway.....  As with most things, you learn things as you go.  I did discover some shortcuts to take, and some other things to definitely go by the book!  Hopefully these tips will help you, too!

our finished sugar cookie cut-outs!


Tips, Tricks & Shortcuts
1.As mentioned earlier, make sure your cookies are NOT LESS THAN 1/4" when cutting out, and underbake a little...that is, if you want a soft cookie {I did mine for just 13 minutes in the oven}.  If you're more of a crispy cookie lover, bake according to Martha's instructions. :)

2. I didn't find it necessary to use different tips for outlining and flooding.  I used a #4 tip for everything, and there weren't any problems.

3. You DEFINITELY need to add a rubberband to the end of your pastry bag to prevent the frosting from coming out!  AND, make sure it's tight!  Don't think that just twisting and holding it firmly in your fist will work - it won't!

4. I didn't find it necessary to wait 5-10 minutes after outlining your cookie.  I just proceeded right into flooding it, and it worked great.

5. If swirling in another color of frosting, use a lot of it!

6. A little bit of food coloring goes a long way!

7. When using your long, flat spatula to spread the icing over the cookie, I found that using a small circular motion worked best.  Also, be sure to spread immediately after flooding the cookie...otherwise, it will start to dry, and you'll see cracks and wrinkles in the icing when you start to spread it.

8. Outline your cookies as close to the edge of the cookie as possible ~ it just looks better!

And last but not least, prepare to give some of these away unless you want to gain 5 pounds that week!! :)

Have a product you'd like reviewed?
Contact me at adamsblankie@gmail.com
www.adamsblankie.com
www.gourmetplay.etsy.com

Wednesday, February 16, 2011

{Recipe:} Margherita Pizza

Everyone loves pizza.  Especially a hot, bubbly cheesy one.  But there's nothing quite like home-made pizza. We're talking about the crust and all ~ no Boboli or pizza dough-purchasing going on here!  If you want it to taste the best, you have to make it from scratch!  But hear me out: it is NOT difficult!!!  Really! 

We made this Margherita Pizza {see ours below} last week and loved it.  And you will, too. {Recipes are courtesy of Family Circle magazine}.


Pizza Dough {Prep 5 minutes, Rise 2 hours}
1 cup warm water
1 package (.25 oz) dry active yeast
2 3/4 cups all-purpose flour
1 teaspoon sugar
1 teaspoon salt
2 tablespoons olive oil

1. Place water in a small bowl and stir in yeast.  Let stand 5 minutes.
2. In a large bowl, whisk together 2 1/2 cups of the flour, sugar and salt.  Make a well in the center and add the yeast mixture and olive oil.  Stir until dough comes together and forms a ball.  Turn out onto a well-floured surface and knead 5 minutes, adding as much of the remaining 1/4 cup flour as needed.  Form into a disk and place in a bowl that has been lightly coated with olive oil.  Turn disk over and cover bowl with plastic wrap.  Allow to rise in a warm place for 2 hours.

Marinara Sauce {Prep 5 minutes, Cook 31 minutes}
2 tablespoons olive oil
4 cloves garlic, finely chopped
1 can (28 oz) tomatoes, crushed by hand
1 teaspoon sugar
1/2 teaspoon dried oregano
1/2 teaspoon dried basil
1/4 teaspoon salt

In a medium-size saucepan, heat oil over medium heat.  Add garlic, cook 1 minute, stirring so garlic does not burn.  Stir in tomatoes, sugar, oregano, basil & salt.  Bring to a boil.  Cook, with lid ajar, for 30 minutes over medium-low heat, stirring occasionally.

{SHORT-CUT!}
Okay, so I have to admit that I cheated here....I took one can (14 oz) tomato sauce and added some sugar, salt, dried basil, oregano and olive oil to it.  I'm sure making it myself would have been better, but I didn't have the time for it!!

Classic Margherita {Prep 10 minutes, Bake at 500 degrees for 13 minutes}
1 pound pizza dough {use previous recipe}
3/4 cup marinara sauce {use previous recipe OR use short-cut listed above!}
1/4 teaspoon dried oregano
6 ounces fresh mozzarella cheese, thinly sliced
1 tablespoon grated {I used slivers} Parmesan cheese
8 fresh basil leaves

1. Heat oven to 500 degrees. Coat a 14" pizza pan with nonstick cooking spray {or, alternately, use a baking stone, as I did, which does NOT need the spray if it's been well-used}.
2. On a lightly floured surface, roll out dough into a 14" circle {or to fit your stone}.  Gently roll up onto a lightly floured rolling pin and unroll onto prepared pan {or stone}.
3. Spread sauce evenly over dough to within 1/2" of edge {I like to use the back of a big spoon to do this, so as not to tear the dough}.  Sprinkle oregano over the sauce.  Arrange mozzarella over the top and sprinkle with the Parmesan cheese.  Bake at 500 degrees for 12-13 minutes or until nicely browned on the bottom {or cheese is bubbly}.  Remove from oven.
4. Garnish with basil.  Cool slightly and cut into 8 wedges. Serve.


I guarantee you will enjoy this classic ~ simple, yet sooooooooooo delicious!  Enjoy!

Have a product you'd like reviewed?
Contact me at adamsblankie@gmail.com
www.adamsblankie.com
www.gourmetplay.etsy.com

Wednesday, February 9, 2011

{Teacher} Valentine Gifts

Okay, ladies, just one week until D-Day...oops, I mean V-Day! {Ha! Freudian slip there!}  Well, maybe you're more organized than me and have all you need to do done already...not me, though.  Yikes!  Okay, actually I am a pretty organized person.  But what happened is, being new to the "Teacher Gifts" world {we're still in our son's first year of school}, I totally overlooked getting a Valentine for my son's teacher.  And, only come to find out yesterday, they're celebrating Valentine's Day early at his school ~ as in, in tomorrow!!!  Eeeeeeeeeeeeeek!!

So, I did as anyone in my position would do:  I went perusing the web for some good ideas for teachers.  And, so sorry to all you alleged helpful sites on finding-a-valentine-for-your-teacher, but I came up with a big. fat. goose egg!  No heart-shaped box of chocolates or mug or coffee is going to do here, people!!   Sooo...I started thinking...and here is what I came up with for what we will be doing TODAY to get things done for his teacher!  The gift is 3-fold: home-made fudge, hand-crafted ivory flower pins/brooches & a hand-made card.  And here are the details:

image of final gift ready to go to his teacher!


Easy Coconut Fudge
Everyone loves something home-made.  Especially when it comes to food ~ let's be honest, nothing compares.  So I decided I had to do something delicious.  But it had to be easy.  C'mon now, I have EXTREMELY short notice here!  The basis to the recipe is from my beloved allrecipes.com, but I did tweak it a bit:

31/2 cups chocolate chips {use what you like here: dark, semi-sweet or milk}
1 can sweetened condensed milk
1/4 cup butter
nuts {optional}
1/2 cup dried, flaked coconut {optional}


Just put it all together in a big bowl and microwave about 3-5 minutes in the microwave, stirring it and checking on it a couple times during that timeframe.  You want it melted but not boiling, or you'll get crystallized {not creamy & smooth} fudge.  OR you can use a double boiler like I did to reduce the risk of burning it.  I actually don't have a double boiler, so I just took a large glass bowl that fit above one of my pots.  I filled the pot with water and waited for it to boil.  Then I placed my bowl over the pot and stirred pretty much constantly until it was all melted together.


Now you can add the chopped up nuts and/or coconut here if you like.  I decided to add just the coconut to go for a "Mounds" feel.  If you add the nuts, too, though, you'll have more of an "Almond Joy" fudge! Yuummm!! {I decided to forgo the nuts, as my son's preschool is a peanut-free school}.


Pour it into a well-greased 8x8 pan {OR I recommend using some tin foil that's been well greased in the pan, to make pulling out the fudge easy for cutting!} and refrigerate an hour or so.  DONE!


After it was well chilled, I cut them into itsy bitsy squares {these guys are RICH!} using my pizza cutter {to get as straight of lines as possible!}.  Then I put them individually in little 3x4 treat bags {from the cake section at Wal-Mart}, and tied them closed with some cute valentine ribbon and scallop-punched tags that I also hole-punched for the ribbon to go through.  I then just my son's name and his teacher's name on them.

the fudge squares all wrapped up!


Creamy Flower Pins/Brooch
I recently added these to my shop, and absolutely adore them!  I don't offer them as pins/brooches in the shop yet, but probably will some time soon {right now, we offer them on headbands only}.  I love that you can add these for a pop to anything~ from your clothing to your purse and more!  Plus, you can mix and match sizes & colors for ultimate customization.  {LOVE.}
*********************************************************************************
UPDATE: You may now purchase both/either the Fabric Flower Brooch OR Tutorial to do it yourself in our shop!  Visit Adam's Blankie to purchase either!! Thanks!!
*********************************************************************************


the flower brooches on a card to give the teacher

here's an example of what the flower brooch look like on
Hand-made Cards
We first used some of the same butterfly scrapbook paper I used earlier for the tags and free-handed the letters, "L," "V," and "E" on it.  Since this was coming from a child, we wanted the letters to be hand-drawn and cut...but if you're just too much of a perfectionist, this is where your Cricut machine or stencils will come into play {or just search the internet for some letters to print, cut and trace onto paper}.  We used a couple of little felt flowers for the "O"  {little silk ones would also work just as well}, or anything you can find around your house shaped like an "O" for that matter!  Knowing I was going to turn this into a tic-tac-toe board, I then placed the letters on the card in places where the square would be.  Once I knew how they'd fit, I just used a ruler to make my grid/tic-tac-toe board.  We used glue dots to put our letters in place {or just use regular craft or Elmer's glue}, and then, with a peach-colored Sharpie marker, filled out the rest of the spaces with "X's" and "O's."  Get it?  Double meaning here - "X's" and "O's" for tic-tac-toe AND for "hugs and kisses!"  {LOVE it!!!}  To embellish it a bit more, I used my chalk ink {if you don't this stuff on hand, I'd highly recommend getting some from your local Michael's or Joann's. I'm not even a scrapbooker, and I find that the basic scrapbooking tools come in hand for many things other than scrapbooking!!} around the front edges of the card to add some depth and a vintage feel.  I used red first, and then muted and toned it down with my cloud white.  Then I just had my son color, stamp & sticker whatever he wanted on the other side of the card, which he loves, and I'm sure will be the favorite part for his teacher, too.

front of card

Then I remembered....there's a teacher aide in his class {insert gasp here!}.  Sooooooooo...are you supposed to give aides a valentine, too?  I would imagine so... So then we added the card imaged below.  I just used the same butterfly scrapbook paper and cut out two hearts, one bigger than the other. The big one represents the teacher, and the second smaller one, my little guy.  I added some scrolly leaves & branches to make them look like little growing flower hearts.  Then I added some of the same chalk ink around the edges of the hearts to add dimension and give it that same vintage-feel.  I actually think I like this one better...probably because it's a bit more whimsical, which is more my style....what about you?  Which one do you prefer?  {Oh, and in case, you're wondering, yes, the teacher aide, too, will also be getting some of the fudge we made!} :)

front side of second card for teacher's aide
back sides of cards my son decorated himself
end result of everything going to the teachers!
 For the packaging, I used some brown paper Kraft bags, cut 2 slits at the top and threaded some ribbon through it.  Then I added another scalloped tag with the teacher's name on the front and my son's name on the back and tied it in a little bow.

Well, we sure hope the teachers both loves their gifts!  But, I have to ask, what do YOU give to your kids' teacher/s for Valentine's Day??  If you have any great craft ideas out there, please share on this thread!

Have a product you'd like reviewed?
Contact me at adamsblankie@gmail.com
www.adamsblankie.com
www.gourmetplay.etsy.com

Monday, December 20, 2010

North Pole Cookie Dough {Recipe}

I'm always searching for a great new recipe.  And I must confess that I prefer baking over cooking.  And when it comes to the holidays, I really get in the spirit!

So, typically for Christmas I make the usuals - from peanut butter cups to peanut butter kisses.  But this year, I came across this recipe and thought I'd share it with ya'll.  It's oh-so-perfect for baking this week, too, with a name like "North Pole Cookie Dough."  Seems just about perfect for baking with your kids and leaving with the milk for Santa this coming Friday night. :)


North Pole Cookie Dough {as per cooksrecipes.com}:
1 1/2 cups semisweet chocolate chips
1 2/3 cups all-purpose flour
1/3 cup unsweetened cocoa powder
1 1/4 teaspoons baking soda
1/4 teaspoon salt
1 cup (two sticks) butter, softened
1/2 cup dark brown sugar, packed
1/2 cup granulated sugar
1 1/4 teaspoons pure vanilla extract
2 large eggs
1 cup semisweet chocolate chunks
1 cup roasted almonds or toasted walnuts, roughly chopped
1 1/2 cups mini marshmallows
  1. Place 1 1/2 cups chocolate chips in microwave-safe dish. Microwave 30 seconds on high, stir and continue to microwave in 10 to 20-second intervals, stirring after each, until chocolate is melted and smooth. Set bowl aside and cool to room temperature.
  2. In medium bowl, whisk together flour, cocoa powder, baking soda and salt. In large bowl, beat butter and both sugars using electric mixer until light and fluffy. Add melted, cooled chocolate and vanilla, blend until fully incorporated. Add eggs, one at a time, beating well after each addition. Add flour mixture slowly; mixing until incorporated. Fold in chocolate chunks, nuts and mini marshmallows.
  3. Fill pint containers with cookie dough and refrigerate up to four days or freeze up to one month.
When giving as a gift, attach following baking instructions:
  1. Preheat oven to 350°F (175°C). Drop dough by rounded tablespoons, or using small cookie scoop, onto parchment-lined baking sheets, about 1 inch apart. Flatten dough slightly using back of spoon.
  2. Bake 10 to 12 minutes, until edges are lightly cracked but centers are still soft.
  3. Remove from oven and cool slightly on baking sheet before transferring cookies to wire rack to cool completely.
Makes 3 "pints" of dough or 2 dozen cookies.
{Recipe and photograph provided courtesy of ButterIsBest.com; through ARA Content.}

Now, I must also admit that when I made this, the dough was a bit crumbly after being refrigerated.  So I would advise letting warm up a bit at room temperature and being certain that you let them cool nearly fully on the cookie sheet before transferring to the wire rack {otherwise, they tend to fall apart more easily}.  Another tip to help keep them together better ~ dont' skimp on the marshmallows!!  If some do happen to break apart, just do as I did and save them for ice cream topping -- yummmmmmmm!

Have a product you'd like reviewed?
Contact me at adamsblankie@gmail.com
www.adamsblankie.com
www.gourmetplay.etsy.com

Monday, July 19, 2010

Homemade Cloth Diaper Detergent Recipe

So you finally did it.  You started cloth diapering.  Do you like it? Is it as hard as you thought?  If you're like me, then the answer is a resounding, "No!" Hooray!  However, after the big investment you put into getting a nice CD {cloth diaper} stash, you've discovered you can't use regular detergent to wash them.  If you do?  Then you're bound for some stinky diapers with built-up residue. You need...{drum roll, please}....cloth diaper detergent.  BUT.  It's expensive.  Really. 

So.  Although I'm a definite Rockin Green Soap lover myself, I decided to try to make my own.  Now, mind you I haven't actually done this yet, but I do plan to make it this week using this easy-as-pie recipe:

Equal Parts:
*Borax
*Arm & Hammer Washing Soda {note: it's NOT baking soda!}
*Oxyclean {or other similar oxygen-cleaning powder}
*optional drop or 2 of your favorite essential oil {orange, lemon, lavender, tea tree, etcetera}.

That's it! Just add 1 - 2 Tablespoons per load, and you're set!

Have a product you'd like reviewed?
Contact me at adamsblankie@gmail.com
www.adamsblankie.com
www.gourmetplay.etsy.com


Tuesday, June 29, 2010

The {Healthy} Soda Fix.

The next time your kiddo asks for some soda (or "pop," if you're from the Midwest, my Alma Mater!}, whip one of these fizzy drinks up for them instead!

Fill the glass with ice
Toss in some fresh fruit (orange wedges, cherries, raspberries, etcetera)
Fill up 2/3 with Seltzer (plain or flavored such as raspberry or orange)
Fill up the last 1/3 with juice (we like cherry or apple)
Finish with a twisty straw


They get all the fizz with some flavor and fresh fruit...not to mention some fun with swirly straw!  Oh.  And way less sugar. :)


Have a product you'd like reviewed?
Contact me at adamsblankie@gmail.com
www.adamsblankie.etsy.com

Monday, June 21, 2010

{Bulk up} on Fresh Produce.

We as mothers know how important as ever it is to get the fruits and veggies in our little ones, but we also know how expensive that can be.  And in this economy, unfortunately healthy eating often goes by the wayside.


So one solution I've heard of {and thought about doing, but haven't yet pulled the trigger on!} is joining a food co-op.  That is, an organization that groups people's resources {a.k.a. money} together to be able to buy bulk amounts of {fresh, might I add!} fruits & veggies.  You get loads of fresh produce at a fraction of the cost of what you would pay at the grocery store.  Why?  You're buying in bulk and often times buying directly from the farmers themselves.  And all you need to do is pay the fee and pick up your produce.

I know there is the "Bountiful Baskets" co-op in Arizona, if you'd like to check it out!  And if you live elsewhere, just do an online search for "food co-op" with your city listed behind it, and you should be able to find some results.

Also, if any of you are involved in one, please let me know how you like it, and if you'd recommend it!

Have a fabulous day, everyone! :)

Have a product you'd like reviewed?
Contact me at adamsblankie@gmail.com
www.adamsblankie.etsy.com
www.gourmetplay.etsy.com


Thursday, June 10, 2010

Baby Bites

With "solids" just around the corner at our house with our baby girl, I am all abuzz with finding some deliciously divine dishes to cook up for her!  I cooked & pureed my own fruits and vegetables for our firstborn, and I fully intend to do the same for our secondborn.

But it has my thinking, "I just gotta find some good twists and "real" recipes out there for babies!"  Don't get me wrong.  I do love the basic, simply purees of whole fruits and veggies.  But I also want to find ways to sneak in some additional flavors that aren't typically found in kid cuisine.  Better to start early than late, right?  That's my theory anyway (especially now that I have a picky 3yo eater in our household!).


So here are a couple books out there that I found helpful on this topic:
 "Cooking for Baby" - ($19.95) We've got this book at our house now, but I have yet to delve into it...got it after the firstborn and before the second's arrival.  Has some really interesting-looking recipes, including "silken tofu & peach puree," & "edamame & yogurt puree."

 "Super Baby Food" ($13.57 on Amazon) - This one's a winner at our house. Goes over all the basics from cooking plain vegetables & fruits, at what age you should introduce them, and specific cooking directions from baking to steaming and more!


"Love in Spoonfulls" ($19.95) - From Parents magazine...still need to try this one out!  Anyone tried any of these recipes and recommend the book?  Let us know!! 

And for the older kids (toddlers, preschoolers & up), there's always "Deceptively Delicious," a.k.a, "Good ways to sneak in some good foods for those picky eaters of yours!"
Huge bonus?  Get a used copy for just $0.40 (plus shipping) on Amazon.com right now!!!


Have a product you'd like reviewed?
Contact me at adamsblankie@gmail.com
www.adamsblankie.etsy.com
www.gourmetplay.etsy.com